Following up from my last post about serverless systems, let’s do a walk-through of the Serverless project.
Getting started
As usual I’ll demo this using a Docker container. You can check out the code on Github and follow along: https://github.com/brianz/serverless-demo.
This Docker image has Serverless v0.5.5…and that’s about it.
I use a basic Makefile to build and run the container. You can take a
look at it yourself and change the container name if you’d like to follow along.
I also recommend reading the getting started docs on the serverless website, perhaps in parallel with this blog post in case I have missed any details.
Prerequisites
If you’re following along, you should create two files alongside the Makefile:
credentialsconfig
These two files will be copied to /root/.aws/ when you build the Docker image.
These should have the following contents which will be specific to you:
credentials
[default]
aws_access_key_id=YOUR_AWS_ACCESS_KEY
aws_secret_access_key=YOUR_AWS_SECRET_KEY
config
[default]
region=YOUR_PREFERRED_REGION(ex. us-west-2)
output=json
Really getting started
With that out of the way, fire up your container and let’s take this for a spin. To build the
container just type make.
brianz@bz-cconline(master)$ make
brianz@bz-cconline(master)$ # lots of output
After that you can start the container with make shell.
brianz@bz-cconline(master)$ make shell
docker run --rm -it \
        -v `pwd`:/code \
        --name=slsdemo "bz/serverless" bash
root@8b733bf6a50a:/code#
root@ea44710fc5db:/code# sls --version
0.5.5
Note that the code in this directory is being mapped to /code on the container. This is one of
my favorite Docker tricks and will help here since anything we do with the serverless or sls
commands will write files to our local file system but be visible in the running container.
Serverless is largely/completely controlled by writing and reading files on the local file system.
By mapping the /code directory on the Docker container to our host system’s we’re ensured we
won’t lose all of our work/files when we stop the container.
Starting a project
We can now start setting up a new serverless project. It’s important to understand that Serverless is coordinating both AWS API Gateway and AWS Lambda for us. When executing commands with Serverless it may be hard to know exactly what’s being done behind the scenes. I’d recommend looking at both API Gateway and Lambda in the AWS Console to see what affect your commands have on those services.
The first thing we’ll do is create a new project which will bootstrap the entire project.
root@48f5e89483ac:/code$ serverless project create
 _______                             __
|   _   .-----.----.--.--.-----.----|  .-----.-----.-----.
|   |___|  -__|   _|  |  |  -__|   _|  |  -__|__ --|__ --|
|____   |_____|__|  \___/|_____|__| |__|_____|_____|_____|
|   |   |             The Serverless Application Framework
|       |                           serverless.com, v0.5.5
`-------'

Serverless: Initializing Serverless Project...
Serverless: Enter a name for this project:  (serverless-rjdqri) serverless-demo
Serverless: Enter a new stage name for this project:  (dev)
Serverless: For the "dev" stage, do you want to use an existing Amazon Web Services profile or
create a new one?
  > Existing Profile
    Create A New Profile
Serverless: Select a profile for your project:
  > default
Serverless: Creating stage "dev"...
Serverless: Select a new region for your stage:
    us-east-1
  > us-west-2
    eu-west-1
    eu-central-1
    ap-northeast-1
Serverless: Creating region "us-west-2" in stage "dev"...
Serverless: Deploying resources to stage "dev" in region "us-west-2" via Cloudformation (~3
minutes)...
Serverless: No resource updates are to be performed.
Serverless: Successfully created region "us-west-2" within stage "dev"
Serverless: Successfully created stage "dev"
Serverless: Successfully initialized project "serverless-demo"
It should be noted that the the step asking about the AWS Profile (where I select “Existing
Profile”) was reading from our previously configured
credentials file. You could also bypass this step and instead type in your AWS credentials by
selecting Create A New Profile. This will save your AWS credentials in a filed named admin.env.
Setting up profiles the admin.env file instead references your named profile stored in your home
directory.
root@48f5e89483ac:/code/serverless-demo$ cat admin.env
AWS_DEV_PROFILE=defaultroot
OK, so what just happened? Let’s take it slow….a new project folder will now exist which is the
name of your project. From now on you’ll need to be in this directory when executing any
serverless commands (or the alias, sls). Let’s have a look inside:
root@c477313ae84f:/code$ cd serverless-demo/
root@c477313ae84f:/code/serverless-demo$ ls -l
total 16
drwxr-xr-x 1 1000 staff  136 Apr 18 22:46 _meta
-rw-r--r-- 1 1000 staff   35 Apr 18 22:46 admin.env
-rw-r--r-- 1 1000 staff  287 Apr 18 22:45 package.json
-rw-r--r-- 1 1000 staff   64 Apr 18 22:45 s-project.json
-rw-r--r-- 1 1000 staff 1527 Apr 18 22:45 s-resources-cf.json
So what exactly are all of these files? Serverless works by creating and reading files on your
local system. These files server different purposes but in the end are used to compose API calls
to Amazon. For example, have a look at s-resource-cf.json…this is the Cloudformation template
which Serverless used to create various resources for you. By looking at it, you can see exactly
what serverless create project actually did. As you can see, we don’t have much now other than
some IAM stuff. If you browse the AWS console you will see that there is a Cloudformation stack
matching what you see in s-resources-cf.json.
Now that we’re bootstrapped let’s get to something more fun.
Create a function and endpoint
Next up, we need to actually create a Lambda function. Again, remember that at this point we really have nothing to use..just some IAM roles.
Your source code can go anywhere really…but what I’ll do here is create a lib directory to hold
any library dependencies (which we’ll use later) and a src directory which is where we’ll put our
own source code.
root@c477313ae84f:/code/serverless-demo$ mkdir lib src
Now, we’re ready to create our own Lambda function which will be a Python 2.7 function.
root@c477313ae84f:/code/serverless-demo$ sls function create src/hello
Serverless: Please, select a runtime for this new Function
    nodejs4.3
  > python2.7
    nodejs (v0.10, soon to be deprecated)
Serverless: For this new Function, would you like to create an Endpoint, Event, or just the
Function?
  > Create Endpoint
    Create Event
    Just the Function...
Serverless: Successfully created function: "src/hello"
The last question isn’t quite intuitive. What exactly is serverless asking you?
Create Endpoint: Will create both an API Gateway endpoint plus the Lambda functionCreate Event: Will create a Lambda function which is setup to be triggered on a schedule or from another type of event (not from API Gateway)Just the Function...: Will create just the Lambda function leaving it up to you to setup how/when it’s triggered
Now, we have some Python code:
root@c477313ae84f:/code/serverless-demo$ ls -l src/hello/
total 12
-rw-r--r-- 1 1000 staff    2 Apr 18 22:53 event.json
-rw-r--r-- 1 1000 staff  226 Apr 18 22:53 handler.py
-rw-r--r-- 1 1000 staff 1198 Apr 18 22:53 s-function.json
Have a look at the code in handler.py:
from __future__ import print_function

import json
import logging

log = logging.getLogger()
log.setLevel(logging.DEBUG)

def handler(event, context):
    log.debug("Received event {}".format(json.dumps(event)))
    return {}
If you’re unfamiliar with Lambda just know that you:
- create a function which accepts two params,
eventandcontext - map the name of the file/function when creating the Lambda so Lambda knows what to execute
- can use any library you need provided you can zip it up in a single zip file and upload it to Lambda
This function is a bit boring…let’s change the return value to be more fun:
# stuff
return {'message': 'Serverless is the future!'}
Now, for the curious browse over to the AWS Lambda page in the AWS Console. Note, your new hello function isn’t there!. Why is this? Well, Serverless has just set things up for you on your local system but you haven’t pushed it to AWS yet.
To get your code running, we need to deploy it.
Deploying an endpoint
Now for the fun part…we’re going to tell Serverless to package up our code, upload it to Lambda
and create us a new endpoint with API Gateway. Sounds complicated and indeed, if you did this by
hand there are several clicks and zip commands to take care of. Let’s see how easy it is with
Serverless.
root@3ce920c5854d:/code/serverless-demo$ sls dash deploy
 _______                             __
|   _   .-----.----.--.--.-----.----|  .-----.-----.-----.
|   |___|  -__|   _|  |  |  -__|   _|  |  -__|__ --|__ --|
|____   |_____|__|  \___/|_____|__| |__|_____|_____|_____|
|   |   |             The Serverless Application Framework
|       |                           serverless.com, v0.5.5
`-------'

Use the <up>, <down>, <pageup>, <pagedown>, <home>, and <end> keys to navigate.
Press <enter> to select/deselect, or <space> to select/deselect and move down.
Press <ctrl> + a to select all, and <ctrl> + d to deselect all.
Press <ctrl> + f to select all functions, and <ctrl> + e to select all endpoints.
Press <ctrl> + <enter> to immediately deploy selected.
Press <escape> to cancel.


Serverless: Select the assets you wish to deploy:
    hello
      function - hello
      endpoint - hello - GET
    - - - - -
  > Deploy
    Cancel

Serverless: Deploying the specified functions in "dev" to the following regions: us-west-2
Serverless: ------------------------
Serverless: Successfully deployed the following functions in "dev" to the following regions:
Serverless: us-west-2 ------------------------
Serverless:   hello (serverless-demo-hello):
arn:aws:lambda:us-west-2:123874195435:function:serverless-demo-hello:dev

Serverless: Deploying endpoints in "dev" to the following regions: us-west-2
Serverless: Successfully deployed endpoints in "dev" to the following regions:
Serverless: us-west-2 ------------------------
Serverless:   GET - hello - https://4m98c4l3i1.execute-api.us-west-2.amazonaws.com/dev/hello
You can’t see it in the syntax highlighting above, but it’s important to deploy both the
function and the endpoint. Here’s how that breaks down and what those two things means:
function: Upload yourhello.pyfunction to Lambda. Serverless takes care of the packaging, upload, etc.endpoint: Create/update the API Gateway endpoint which will be responsible for calling thehello.pyfunction
With that we get a URL…let’s test it out:
brianz@bz-cconline(master)$ curl https://4m98c4l3i1.execute-api.us-west-2.amazonaws.com/dev/hello && echo
{"message": "Serverless is the future!"}
Nice! You can see that it just returns a our fun message, but hot damned, it worked! Let’s add a
-v to see the details from the request:o
brianz@bz-cconline(master)$ curl -v https://4m98c4l3i1.execute-api.us-west-2.amazonaws.com/dev/hello && echo
*   Trying 54.192.137.191...
* Connected to 4m98c4l3i1.execute-api.us-west-2.amazonaws.com (54.192.137.191) port 443 (#0)
* TLS 1.2 connection using TLS_ECDHE_RSA_WITH_AES_128_CBC_SHA256
* Server certificate: *.execute-api.us-west-2.amazonaws.com
* Server certificate: Symantec Class 3 Secure Server CA - G4
* Server certificate: VeriSign Class 3 Public Primary Certification Authority - G5
> GET /dev/hello HTTP/1.1
> Host: 4m98c4l3i1.execute-api.us-west-2.amazonaws.com
> User-Agent: curl/7.43.0
> Accept: */*
>
< HTTP/1.1 200 OK
< Content-Type: application/json;charset=UTF-8
< Content-Length: 40
< Connection: keep-alive
< Date: Tue, 03 May 2016 02:47:27 GMT
< x-amzn-RequestId: 5f2a649a-10d9-11e6-b880-9737ae2ed884
< X-Cache: Miss from cloudfront
< Via: 1.1 b67f54b549c6579a21be3a5a67642d7a.cloudfront.net (CloudFront)
< X-Amz-Cf-Id: 8SqEhohANyUqXGf-uvv9_-dsJLU2SZBvAHCrU1B1d3sIqARCt-weuQ==
<
* Connection #0 to host 4m98c4l3i1.execute-api.us-west-2.amazonaws.com left intact
{"message": "Serverless is the future!"}
Note that our Content-Type header is being returned as application/json;charset=UTF-8. This
works quite well for us in this case since our Lambda function returned a Python dictionary and
apparently it’s getting cast to a JSON object somewhere along the way. Here is where the details of
API Gateway come into play. Let’s assume we wanted our API to return HTML…how would we do that?
Update and deploy a function
With our goal of returning HTML, let’s update our function.
def handler(event, context):
    return """<html>
    <head></head>
    <body>
        <h1>Hello from Serverless/API Gateway/Lambda</h1>
        <h2>Event:</h2>
        <pre>
            %s
        </pre>
        </body>
    </html>""" % (json.dumps(event), )
What we’ll do now is deploy this. Note, the analogy here is rolling out new code. Think about how complicated that normally is with a traditional web application. Undoubtedly there are scripts, CI systems and the like who are tasked with rolling out your new code. Here, we’re going to roll out our code with one small command and it will take mere seconds:
Note, some text removed for brevity:
root@3ce920c5854d:/code/serverless-demo$ sls dash deploy
Serverless: Select the assets you wish to deploy:
    hello
      > function - hello
      endpoint - hello - GET
    - - - - -
  > Deploy
    Cancel
We select just the function since our API Gateway endpoint isn’t changing at all. This took about 20 seconds for me and I’ve seen it go faster and slower…but I’ve never seen it take longer than a minute or so. Once we start pushing up Lambda functions with more requirements the zip files will be larger and uploads will take slightly longer.
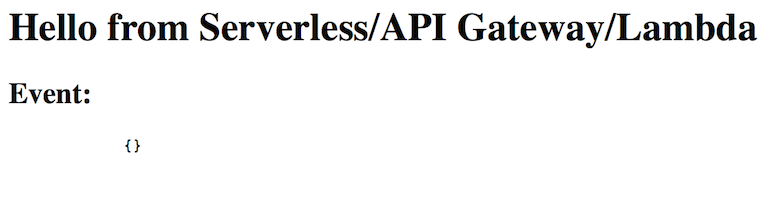
Let’s load it in browser and see what we get now!
"<html>\n    <head></head>\n    <body>\n        <h1>Hello from Serverless/API Gateway/Lambda</h1>\n
<h2>Event:</h2>\n        <pre>\n            {}\n        </pre>\n        </body>\n    </html>"
Hrm. Not exactly what we were hoping for.
Remember our Content-Type header? Let’s see what it is now:
brianz@bz-cconline(master)$ curl -v -s https://4m98c4l3i1.execute-api.us-west-2.amazonaws.com/dev/hello 2>&1 | grep Content-Type
< Content-Type: application/json;charset=UTF-8
Yup…my browser isn’t parsing this because it thinks it’s JSON. To solve this we need to tell API
Gateway to return text/html. Honestly, this is way harder than it should be. By default we
saw that API Gateway is setup to return application/json which worked great out of the box. To
make it return text/html is much more convoluted and not intuitive in the least. To do this we’ll
need to tweak the mappings in API Gateway via the s-function.json file. I’m not going to explain
the details for now mostly because I’m still figuring out exactly how these mapping work. For now,
here are the lines you’ll need to change:
"responses": {
    "400": {
    "statusCode": "400"
},
"default": {
    "statusCode": "200",
    "responseParameters": {
        "method.response.header.Content-Type": "'text/html'"
    },
    "responseTemplates": {
        "text/html": "$input.path('$')"
    }
}
The lines are those with text/html in them. Now, we just sls dash deploy again, select just the
endpoint and refresh our browser:
Success!
Summary
Serverless is quite amazing and I’m very excited by this project. When building SAAS applications it’s quite obvious how much power and flexibility this gives us. Of course, there are limitations to this type of system and not all problems can be solved with Serverless…but a lot of them can.
I will attempt to follow up with more details in future posts…look for Part III coming soon.